Showing posts with label GUI. Show all posts

Tuesday, 2 July 2019

Menu builder


Menu builder is a tool in Livecode to create cool top menu:

Please not that on Mac it appears externally of the program:

Normal

On a Mac

The too in in the menu Tool -> Menu Builder:
On the left there are the main menu items, on the right the submenu of each item.
Dal menu builder potete aggiungere tutta una serie di effetti semplicemente usando il mouse, e le modifiche appariranno nel nome con un codice. This is the list of special chars and their meanings:
  • -   simple dash is a line divider
  • !c  this put a check before the menu item
  • !n this remove a check before the menu item
  • !r this put a list point before the item
  • !u this remove a list point before the item
  • & special char to call the item
  • / shortcat chara
  • ( rende il menu disabilitato
  • TAB to creat esubmenus
Fo examle this text
produce this:

You can use tags to change just what you see, but not the command; for example wiht multiple languages, you change only the tag. Example

Paste/V|Incolla


Tuesday, 21 May 2019

Text margins

Default margins are 8 pixel from the border:
We can change them in many ways: with the property margins, all to a single value:

on mouseUp
   set the margins of field 1 to 0
end mouseUp


or with margins and all four different values:

on mouseUp
   set the margins of field 1 to 2,10,10,0
end mouseUp


Or with the single properties: topMargin, rightMargin , bottomMargin , leftMargin.

Monday, 22 April 2019

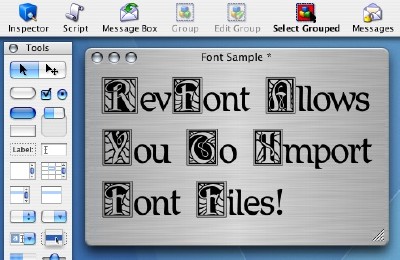
Using external fonts

You can incorporate fonts in your app or program in livecode, you can use on Windows and Mac the start using font, example:

start using font file "c:/myFont.ttf"

but you have also to add in the list of the file to copy:
On linux is different, you need to copy the font in the folder "~/.fonts/" and then launch fc-cache -f, for example:

create folder "~/.fonts"
revCopyFile "DroidSansMono.ttf", "~/.fonts/DroidSansMono.ttf"
put shell("fc-cache -fv") into temp

Thursday, 11 April 2019

Animated scrolling text

Creating an animated scrolling text can be achieved by livecode in two ways:
  • text manipulation
  • graphic manipulation
We'll see both ways.

TEXT MANIPULATION

Just create a field and put this code in it:

on movingtext mytext, myspeed
   set the realtext of me to mytext
   set the realtext2 of me to mytext
   stripspaces
   set the text of me to empty
   createspaces
   put the realtext2 of me into temp
   put the text of me before temp
   #put the text of me after temp
   set the realtext2 of me to temp
   set the text of me to temp
   set the cyclet of me to true
   cycleText myspeed
end movingtext

on stopcycle
   set the cyclet of me to false
end stopcycle

on stripspaces
   put the realtext2 of me into temp
   if the last char of temp is space then
      delete the last char of me
      set the realtext2 of me to temp
      stripspaces
   end if
end stripspaces

on cycletext myspeed
   put the realtext2 of me into temp
   put the number of chars of temp into nt
   set the text of me to temp
   repeat for nt times
      delete char 1 of me
      if not the cyclet of me then exit repeat
      wait mySpeed sec with messages
   end repeat
   if the cyclet of me then send "cycletext " & myspeed to me in 0 sec
end cycletext

on createspaces
   set the dontwrap of me to true
   put space after me
   if the formattedwidth of me < the width of me then
      createspaces
   end if
end createspaces


Now you have the following messages to use:
  • movingtext TEXT,SPEED: you use this message to change text, start scrolling setting the scroll speed
  • stopcycle to stop scrolling text

GRAPHIC MANIPULATION

Create a field and put this code inside it:

on cycleText myText, mySpeed
   lock screen
   set the locktext of me to true
   set the dontwrap of me to true
   set the pcontinue of me to true
   set the text of me to myText
   clone me as "clonefield"
   put the ID of the last field into tID
   set the pcloneid of me to tID
   set the width of fld id tid to the formattedwidth of fld id tid
   set opaque of field id tid to false
   set showFocusBorder of field id tid to false
   set threeD of field id tid to false
   set showborder of field id tid to false
   set lockText of field id tid to true
   set the left of fld id tid to the right of me
   set the top of fld id tid to the top of me
   create graphic "cycleR"
   put the id of the last graphic into tID2
   set the pgr of me to tID2
   set the style of graphic id tid2 to "rectangle"
   set the rect of graphic id tid2 to the rect of fld id tid
   set the opaque of graphic id tid2 to true
   set the backgroundcolor of graphic id tid2 to the backgroundcolor of this card
   set the linesize of graphic id tid2 to 0
   clone graphic id tid2
   put the id of the last graphic into tid3
   set the pgL of me to tid3
   set the right of graphic id tid3 to the left of me
   set the top of the graphic id tid3 to the top of me
   set the prealText of me to the text of me
   set the text of me to empty
   set the pmyspeed of me to myspeed
   unlock screen
   cycle2 mySpeed
end cycleText

on cycle2 mySpeed
   put the pcloneid of me into temp
   if exists(field id temp) then   
      set the left of fld id temp to (the left of field id temp - 1)
      wait myspeed sec
      if the right of fld id temp < the left of me then
         set the left of fld id temp to the right of me
      end if
   end if
   if the pcontinue of me then send "cycle2 "& mySpeed to me in 0 sec
end cycle2

on StopCycle
   set the pcontinue of me to false
   set the text of me to the pRealText of me
   put the pcloneid of me into tid
   put the pgr of me into tid2
   put the pGL of me into tid3
   delete field id tid
   delete graphic id tid2
   delete graphic id tid3
end StopCycle


RESULTS

You can see results in the following video, the text mode is confinde in it's space but it sn't constant due the difference in size of each letter, on the other hand the gaphic mode is smother but needs on the left and on the righe no other object, because we have to cover the text:

Monday, 8 April 2019

Driving a car

If you need to create a car videogame, the controls are always relative where the car point to, so you need a little of geometry and trigonometry to do a correct work, let's see an example.
Let's create a stack with the image of a car, call the image car:
In order to rotate it, you just need to use the angle property, but how to move when it's rotated?
Now add this code to the card:


on arrowkey puls      
   put the keysdown into temp2
   repeat for each item tItem in temp2
      switch tItem
         case "65362"
            put the angle of image "car" into temp         
            #creaimo una strina del tipo x,y
            put -5 * sin( pi / 180 * temp) into movimento
            put "," after movimento
            put -5 * cos( pi / 180 * temp) after movimento
            move image "car" relative movimento      
            break         
         case "65364"
            #dobbiamo muoverla in indietro rispetto al verso del muso
            #prendiamo l'angolo della direzione
            put the angle of image "car" into temp         
            #creaimo una strina del tipo x,y
            put 5 * sin( pi / 180 * temp) into movimento
            put "," after movimento
            put 5 * cos( pi / 180 * temp) after movimento
            move image "car" relative movimento      
            break         
         case "65361"
            put the angle of image "car" into temp
            add 1 to temp
            set the angle of image "car" to temp
            break               
         case "65363"
            put the angle of image "car" into temp
            add -1 to temp      
            set the angle of image "car" to temp
            break                        
      end switch
   end repeat
end arrowkey


Finished! Explanation:
First of all, the angle property is always between 0 and 360, if you put the value out of this, livecode reconvert it, i.e. 361 becomes 1.
The same for position values, livecode convert to the nearest integer.
Just to keep in mind that angle is in degree, but sine and cosine use radians, so there is the conversion formula n/180.
The keydown is better for contemporary buttons pressed.
Finally, these are the coordinate systems on computers:
  • origin in the top left
  • X to the right
  • Y to the bottom
  • image angle at 12.00 and clockwise
like this:

Sunday, 7 April 2019

Sudoku game

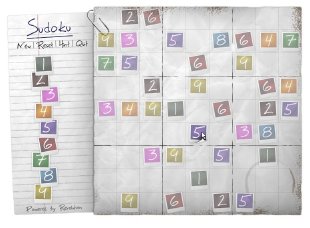
Today I'll show you a very good game made in livecode: a sudoku game.
You can download the livecode source from here: http://www.maxvessi.net/pmwiki/uploads/Site/Sudoku.zip
So you can play and see the code. You have transparencies, dragging images, and sudoku generation algorithm.
This is a screenshot:


Thursday, 4 April 2019

Fonts and links

Using the property inspector of livecode you can set many effects for your font:
Here the explanations:
  • textFont is the font used
  • textSize is the size of the fonr
  • textStyle can be:
    • bold
    • italic
    • underlined
    • boxed
    • 3D boxed
    • link
    • strikethrough
  • textAling is the alignof the text
  • fixedLineHeight is to permit or not the custom height of each line
  • textHeight is the distance between lines
  • margins is the distance of text from box around it
However you can mix  all styles using the htmlText property, for example if you have a field named label1 and put this code in a button:

on mouseUp
   put "<h1>Titolo 1</h1>" after temp
   put "<h2>Titolo 2</h2>" after temp   
   put "Questo e' un esempio di testo con piu' stili contemporaneamente. Ecco un elenco puntato:" after temp
   put "<ul>" after temp
   put "<li>primo elemento</li>" after temp
   put "<li>secondo elemento</li>" after temp
   put "</ul>" after temp
   put "Ecco un link: <a >www.livecode.com</a>" after temp
   set the htmltext of field "label1" to temp
end mouseUp

Clicking the button, you'll obtain this:

The link www.livecode.com is just text, to activate it you have to use the message linkCLicked, like this:

on linkClicked pLink
   launch url pLink
end linkClicked

The linkClicked will launch the browser to the url of the text of the link, so you can have different links on the same text and all will work correctly.

Wednesday, 3 April 2019

Justified text

One missing thing in livecode is the justified text. However there are some workaround.
The first option is to use the free hhtextEdit widget for livecode:
It's based on the browser widget, full of option. You can download from this link: http://livecodeshare.runrev.com/stack/860/HHTextEditBasic

Otherwise you can use this code in a field:

local finaltext

on closefield
   justifyme
end closefield

on justifyme
   lock screen
   put empty into finaltext
   stripspaces
   set the dontwrap of me to true
   put the text of me into temp
   set the text of me to empty
   replace return with (space & chartonum(1) & space ) in temp #we separete words with newlines attached, and much more, newline is a word now
   put the width of me into tw
   put the number of words of temp into nw
   repeat with i=1 to nw
      if word i of temp is chartonum(1) then
         put return after me
         put the text of me after finaltext
         put empty into me
         next repeat
      end if
      put word i of temp after me
      if the formattedwidth of me > tw then
         delete the last word of me
         addspaces 0
         put word i of temp & space into me         
      else
         put space after me
      end if
   end repeat
   put the text of me after finaltext
   set the text of me to finaltext
   set the dontwrap of me to false
   unlock screen
end justifyme

on addspaces temp
   if the number of words of me is 1 then
      put the text of me after finaltext
      set the text of me to empty
      exit addspaces
   end if
   
   put the width of me into tw
   put the number of words of me -1 into nspaces #the correct number of spaces between words is nspaces -1, but we'll use mod
   put temp mod nspaces into temp
   add 1 to temp
   put space after word temp of me
   if the formattedwidth of me > tw then
      put the number of chars of word 1 to temp of me into tc
      delete char (tc +1) of me
      put the text of me & space after finaltext
      set the text of me to empty
   else
      addspaces temp
   end if
end addspaces

on stripspaces
   put the text of me into temp
   repeat for each char tchar in temp
      if (tchar is space) and (the last char of t2 is space) then
         next repeat
      else
         put tchar after t2
      end if
   end repeat
   set the text of me to t2
end stripspaces

on resizeControl
   justifyme   
end resizeControl


The result is good: